
3 steps to the best lash lift and brow lamination

1,2,3…we have Lash Lift!
Do your clients crave beautifully curled lashes and fuller, defined brows? If so, Hive of Beauty has the perfect range to give every client the lashes and brows of their dreams!
Versatile, fast-acting, and so easy to work with, the Hive of Beauty Lash Lift 3 step system uses a unique dual action formula that allows you to create gorgeously lifted lashes and perfectly laminated brows with the exact same products. It’s an absolute game-changer for lash and brow techs! Say goodbye to multiple products cluttering your workstation – this miracle trio is all you need to perform the two most popular beauty treatments of the moment.
What is a lash lift?
Also known as a lash perm, eyelash lifting treatments work by lifting lashes from the base to create a luscious, curled lash look that lasts up to 8 weeks. Customisable for every client, lash lift treatments can range from a soft, natural curl to dramatic, eye-popping looks – whatever your client’s lash length or growth direction, they can be sure of a noticeable difference. A great alternative to the daily use of eyelash curlers and mascara, why not add a touch of lash dye to create a full lash lift and tint treatment? Your clients will be obsessed with the result!
What is brow lamination?
The 2 most popular words in the brow tech’s roster, brow lamination is the answer to thicker, fuller-looking eyebrows. Working in much the same way as a lash lift, eyebrow lamination uses the same 3 step system to lift and fix hairs into your client’s desired shape and style. Complete the treatment with a tint and wax and you’ve got perfectly defined brows that last for up to 6 weeks. From a neat, defined look to fluffy brows à la Cara Delevigne, brow lamination is such a versatile treatment. It’s no wonder clients can’t get enough!
How does the Hive dual system work?
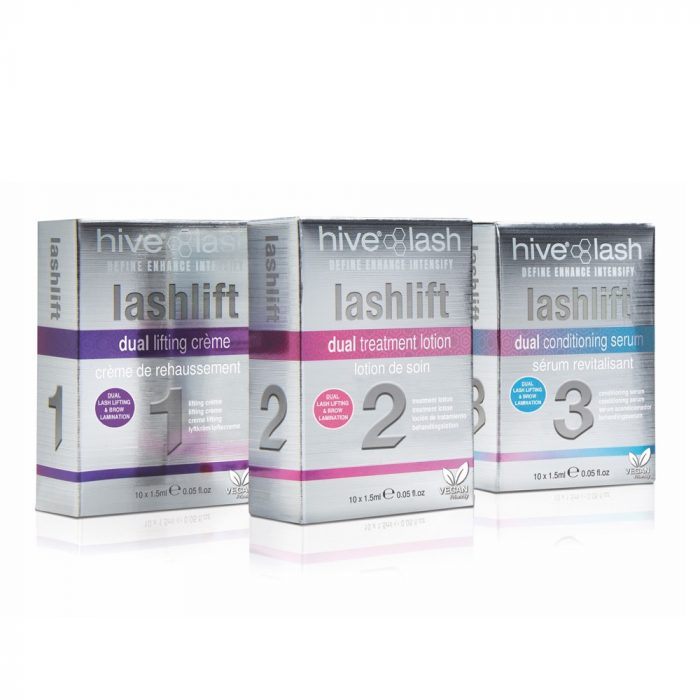
Whether you’re lifting lashes or fixing brows, with Hive of Beauty, it really is as easy as 1,2,3. Let’s meet the only 3 products you’ll need…
1 – Lifting Crème: Enhanced with Hydrolysed Silk and and Vitamin B3, step one works by weakening the disulphide bonds in each hair, allowing them to be lifted into their new shape. Hive Lifting Crème is also enriched with Cocoa Butter to moisturise lash and brow hairs, leaving them soft and silky.
2 – Treatment Lotion: Step 2 is where the fixing comes in. This fast-acting lotion restores the hair’s disulphide bonds, expertly securing them into their new shape and position.
3 – Conditioning Serum: The essential final step, this lightweight serum with Aloe Vera moisturises the treated hairs to promote a healthy shine. It’s also great for gently removing any tint or lash lift bonding serum.
Developed by beauty professionals using a super-fast-acting, vegan-friendly formula, you can rely on Hive of Beauty lash lift to take your clients brows and lashes to the next level.
Step by step lash lift
Preparation
- Gently massage Hive Lash Lift sachets and decant into dappen dishes or glue rings.
- Sanitise hands with the Hive Antibacterial Hand Gel.
- Remove any traces of makeup using an oil-free make-up remover and comb the lashes using a disposable mascara wand.
- Place a collagen eye patch under each eye, ensuring your client’s bottom lashes are secured under the pads.
- Apply your chosen Hive Lash Lifting Shield, trimming to fit as required.
- Apply Hive Lash Lift Bonding Serum to the shield in small sections.
- Using a lash tool, gently lift the lashes from the root and attach to the shield, gradually moving along the shield until all lashes are bonded.
Step 1
- Apply a small amount of Hive Lash Lifting Crème from the root to the centre of the lashes using a micro-applicator.
- Leave to process for 4-10 minutes, depending on your client’s lash type.
- Very fine lashes – 4-5 minutes
- Fine or tinted lashes – 5-6 minutes
- Natural, healthy lashes – 6-8 minutes
- Coarse, healthy lashes – 8-10 minutes
- Remove using a clean micro-applicator.
Step 2
- Apply a small amount of Hive Treatment Lotion from the root to the centre of the lashes using a micro-applicator.
- Leave to process for 5-6 minutes.
- Very fine, fine, or tinted lashes – 5 minutes
- Natural or coarse, healthy lashes – 6 minutes
- Remove using a clean micro-applicator
- Apply tint here if performing a lash lift and tint treatment.
Step 3
- Apply Hive Conditioning Treatment over the lashes using a micro-applicator, gently releasing lashes from the shield.
- Release the shield from the eye by applying serum to to the eyelid under the shield and gently peeling away.
- Use a clean cotton bud to remove any excess serum.
- Remove the under eye patches and comb the lashes up using a disposable mascara wand.

Step by step brow lamination
Preparation
- Gently massage the sachets and decant into dappen dishes or glue rings.
- Sanitise hands with the Hive Antibacterial Hand Gel.
- Remove any traces of makeup using an oil-free make-up remover and comb the brows using a disposable mascara wand.
- Apply a thin coat of the Hive Bonding Serum to the brows. Using a mascara brush, slowly and carefully straighten the hairs in the desired direction and shape, ensuring sparse areas are covered, curly hairs are straightened, and all brow hairs are in the correct direction,
Step 1
- Apply a thin coat of Hive Lifting Crème to the brow hairs. Apply closer to the roots if you want to set in a specific direction, or to the entire hair if you want to soften thick hair and straighten curly hair.
- Leave to process for 3-7 minutes, depending on your client’s brow type.
- Very fine brows – 3-4 minutes
- Fine or tinted brows – 4-5 minutes
- Natural, healthy brows – 5-6 minutes
- Coarse, healthy brows – 6-7 minutes
- Remove using a clean micro-applicator.
Step 2
- Apply a small amount of Treatment Lotion from the root to the centre of the brows using a micro-applicator.
- Leave to process for 5-6 minutes.
- Very fine, fine, or tinted brows – 5 minutes
- Natural or coarse, healthy brows – 6 minutes
- Remove using a clean micro-applicator.
Optional tint & wax
- Prepare your chosen eyebrow tint and apply using a tinting brush.
- Remove after 1-3 minutes using a clean cotton bud.
- Wax brows into the desired shape using your favourite Hive of Beauty Wax.
Step 3
- Apply Hive Conditioning Serum to the brows using a micro-applicator.

And there you have it! 3 steps to the best lash lift and brow lamination treatments using a single range from Hive of Beauty. Can’t wait to add this system to your lamination and lash lift kit? Shop Hive of Beauty online where you’ll find all the essential steps plus the full Hive Lash Lift Dual Kit.
Do you want to learn more about these popular treatments? At Adel Academy, we’ve got plenty of beauty courses to help you on your journey, including a Lash Lift, Tint & Curl Course and Brow Lamination training! Book your place online today.
Comments are closed here.