
Everything we know and love about Glitterbels Acrylic Powder
If you caught Glitterbels owner, Annabel Maginnis’, interview with Professional Beauty Magazine, you’ll know that she believes acrylics are well and truly back! Where we’ve seen a shift in recent years towards gel polish and builder gel (and, my goodness, do we love the Glitterbels Builder-bel collection!) – demand for acrylic nails is on the rise. Perfect for sculpting or adding strength and length to natural nails or tips, there’s so much to admire about Glitterbels acrylic powder.
What are acrylic nails?
Acrylic nails are created by mixing acrylic nail powder with a liquid monomer. This creates a paste-like product which is applied to natural nails. Then, you can sculpt and shape using a form or simply using the natural nail as a guide. Once sculpted, acrylics are then filed into the desired shape and length for your client’s perfect nail look.
Benefits of acrylic nails
So what are the benefits of acrylic powder? The best thing about acrylic powder used in nail salons is that it provides amazing strength and durability. Far stronger than gel polish, the thicker consistency of acrylic nails gives them greater stability and improved resistance to chipping a breaking. The ideal choice for clients with active lifestyles, or whose nails are particularly prone to breakage. What’s more, acrylics are super long-lasting – up to 6 weeks with correct maintenance and regular in-fills!
Acrylic nails do have a more artificial look than gel or builder gel. Their opaque finish certainly won’t be fooling anyone into thinking those talons are natural, but that’s why acrylic nail powder is so popular for out-there nail art and 3D designs.
Another great benefit of acrylic powder is that it’s so customisable. Rather than being confined to the shape of nail tips, with acrylics, you’re in control from start to finish. Whether your clients want a slight enhancement in length and shape, or want to push the boundaries with some extra inches, you can do it with acrylic!

Why choose Glitterbels Acrylic Powder?
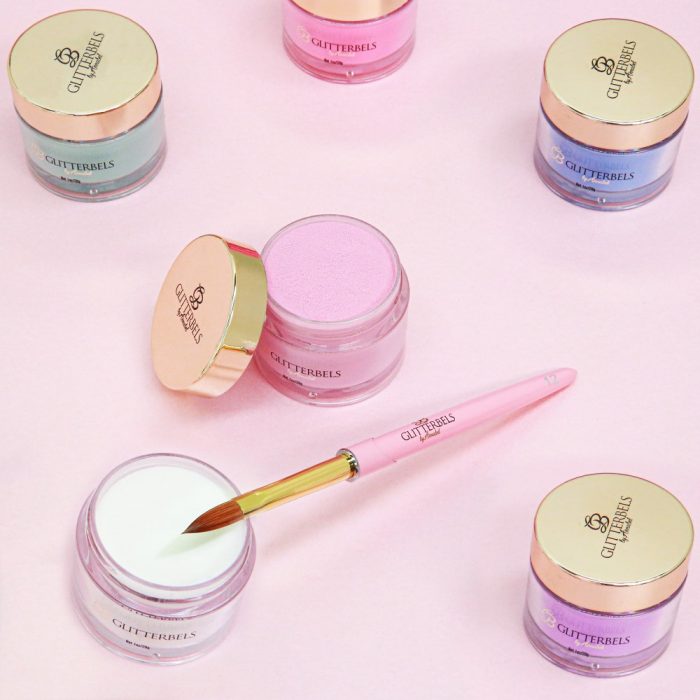
If you want to create the best acrylic nails going, then Glitterbels will help you do just that! Carefully crafted with nail techs in mind, the Glitterbels acrylic nail powder collection offers literally hundreds of colours. From core powders that create the perfect base, to highly-pigmented coloured acrylic powders, to pre-mixed glitter acrylics that combine coloured powders with glitters and flakes, the array of Glitterbels acrylic colours is unparalleled! It’s no wonder Glitterbels is seen as one of the best acrylic nail brands in the UK.
Having the best acrylic nail colours is one thing, but Glitterbels also boasts a whole host of fantastic features and benefits like:
- Super-pigmented powders for stunning results.
- Easy to control formula.
- Smooth application guaranteed every time.
- Perfect for fades, blends and nail art designs.
- A range of monomers including clear, violet, and hema-free.
How to use Glitterbels acrylic
To build a professional acrylic nail kit, you’ll need some essential tools and products. Here’s a list of things you need to do acrylic nails:
- Nail tips or forms (plus nail glue and tip cutters if using tips).
- A good quality, professional acrylic nail brush.
- Nail dehydrator and primer.
- Your choice of acrylic liquid and powders.
- Dappen dish.
- 100/180 grit nail file and buffing block.
- Top coat and nail lamp.
- Cuticle oil.
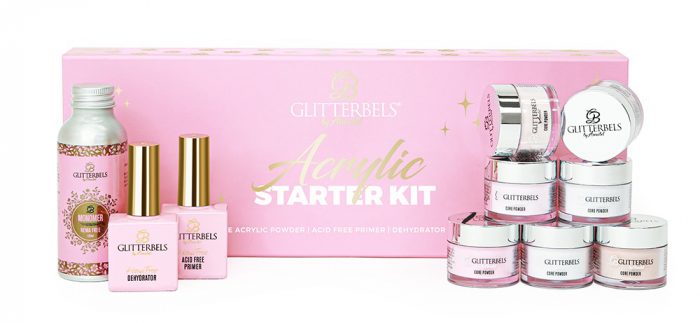
If you’re just starting out with Glitterbels, the Glitterbels Acrylic Kit is a must-buy. Beautifully packaged, it comes complete with 7 core acrylic powders, a Hema-free monomer and full-sized Hema-free Dehydrator and Acid-Free Primer.
So, now you’ve built your kit, let’s get cracking!
Step-by-step Glitterbels acrylic nails
- Prepare the natural nails by filing into shape, pushing back the cuticles, and using a nail buffing block to remove any shine.
- If using nail tips, adhere to the natural nails using Glitterbels Effortless Adhesion Glue. Once secure, cut the tip down to your client’s preferred length and file, making sure to blend the area where the tip meets the natural nail to avoid lips and bumps.
- Apply Glitterbels Dehydrator and follow with the Acid-Free Primer for expert adhesion.
- Pour your chosen monomer into the dappen dish and saturate your nail brush with acrylic liquid. Drain off any excess by gently tapping the belly of your brush on the side of the dish.
- Using your brush, dip into your acrylic powder to create your first bead.
Top tip: apply a thin layer of clear acrylic first. This will make it easier to file down to a clear base when your client is ready to switch up their nail design. - Apply your first bead close to the cuticle and pat into shape, being careful not to flood the cuticle area. Use the tip of your brush to drag the bead down the nail.
- Once the clear base layer has set, apply your coloured acrylic powder, starting in the middle and dragging towards the tip of the nail.
- Then, apply acrylic powder closer to the cuticle area to build an apex, gently dragging towards the tip again.
- If using core powders, the acrylic is now ready to set. If using a coloured acrylic, apply a final layer of Glitterbels Glass Slippers to cap the colour.
- Once fully set, file the side walls and free edges using the 100 grit side of your file. Use the 180 grit side to smooth out any bumps on the nail’s surface. Brush away any dust.
- You can then get creative with gel nail art, or simply finish with a thin layer of Glitterbels Top Coat, curing under your nail lamp for 60 seconds.
- Finish off with a drop of cuticle oil on each finger to nourish the nails.
How to remove Glitterbels acrylic
Ensuring acrylic nails are removed correctly is key to keeping your client’s natural nails healthy. Follow this step-by-step for safe and effective removal.
- Begin by filing off as much of the acrylic as you can, making sure to file in one direction and avoid a seesawing action as this is more likely to damage the natural nails.
- Now it’s time to soak. Saturate cotton pads in acetone and place one on each nail before wrapping snuggly in foil. Leave for around 15-20 minutes. If you prefer, you can simply ask your client to place their hands into a bowl of acetone to soak; however, this technique is more likely to dry out your client’s skin.
- Using a cuticle pusher, gently remove any softened acrylic residue and go over with a buffing block to ensure the nail surface is perfectly smooth.
- You’re then ready to apply a new nail set!
Acrylic Nail Course
If you’re new to acrylic nails or want to refresh your skills, why not book yourself onto the Adel Academy Acrylic Nail Course? This immersive 2-day nail training course guides you through essential acrylic knowledge and skills, from nail health and anatomy, to prep, application, infills, and removal. There’s no better time to get started with acrylics than now!
Comments are closed here.